How to manage the camera account on the Tapo app
Recent updates may have expanded access to feature(s) discussed in this FAQ. Visit your product's support page, select the correct hardware version for your device, and check either the Datasheet or the firmware section for the latest improvements added to your product. Please note that product availability varies by region, and certain models may not be available in your region.
The camera account is used for Tapo camera login on other portals, like on the third-party camera surveillance software or a NAS. Here are the instructions for creating or changing the camera account on the Tapo app.
Part1: Create or change the camera account
1. On the Home page of the Tapo app, tap your camera model card or tap the Cameras tab>click on Manage on your camera model to go to the Live View page.

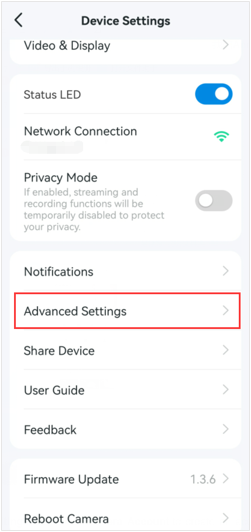
2. On the Live View page, tap the icon on the top right corner to enter the Device Settings page.

3. Tap Advanced Settings on the Device Settings page and then click on Camera Account to create or change the camera account.

If you haven’t created a camera account, enter the username and password to create one.
If you already have one, enter the password you have set to confirm the account, and then set a new username and password for your camera.


Part2: Delete camera account
Tap the Account Information on the Camera Account page, and enter the Camera Account’s password to Verify Your Account; then, you will see the Delete Account option. Tap on it to delete your account.

