よくある質問
TapoとSmartThingsの紐付けの手順
TC40, TC40GW, TC41, TC42, TC53, TC55, TC60, TC65, TC70, TC71, TC72, TCW61, Tapo C100, Tapo C101, Tapo C103, Tapo C110, Tapo C111, Tapo C113, Tapo C120, Tapo C125, Tapo C200, Tapo C200C, Tapo C201, Tapo C202, Tapo C206, Tapo C207, Tapo C210, Tapo C211, Tapo C212, Tapo C216, Tapo C21A, Tapo C220, Tapo C222, Tapo C225, Tapo C260, Tapo C310, Tapo C320WS, Tapo C325WB, Tapo C500, Tapo C501GW, Tapo C510W, Tapo C51A, Tapo C520WS, Tapo C52A, Tapo C530WS, Tapo C615G KIT, Tapo C720, Tapo D205, Tapo DL110, Tapo L430C, Tapo L430P, Tapo L520E, Tapo L530E, Tapo L610, Tapo L630, Tapo P100, Tapo P110, Tapo P115
08-24-2021
1,161,301
このFAQで説明されている機能は、アップデートにより拡張されている場合があります。製品のサポートページからお使いのデバイスに適したハードウェアバージョンを選択し、データシートやリリースノートで新たに追加・改善された点をご確認ください。なお、製品の提供状況は地域によって異なるため、ご利用の地域によっては一部モデルを使用できない場合もありますのでご注意ください。
この記事ではSmartThingsとTapoの紐付けの手順について解説いたします。
設定の前に:
1. Tapoデバイスの初期設定を済ませ、Tapoアプリで操作できる状態にしておいてください。
2. SmartThingsアプリをダウンロードし、SmartThingsアカウントの作成とログインを済ませておいてください。
TapoデバイスとSmartThingsを紐付け:
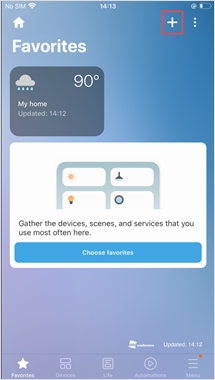
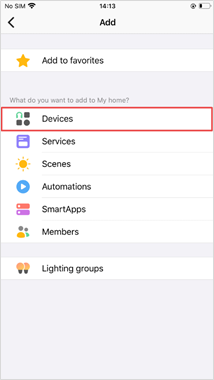
Step 1: SmartThingsアプリを開き、“+”アイコンをタップし“Devices”を選択します。
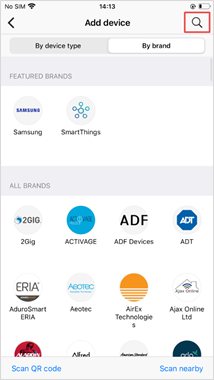
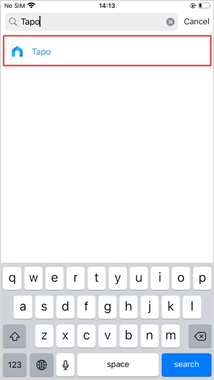
Step 2. ブランド一覧から“Tapo”を選択し、タップします。
Step 3. “Outlet”をタップします。
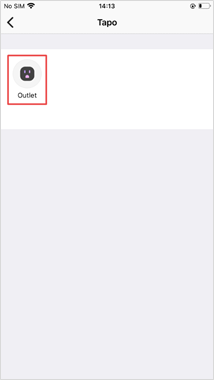
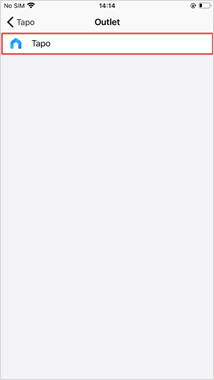
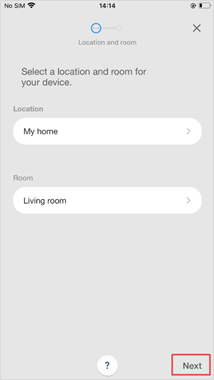
Step 4. “Tapo”をタップし、ロケーションを選択したら“Next”をタップします。
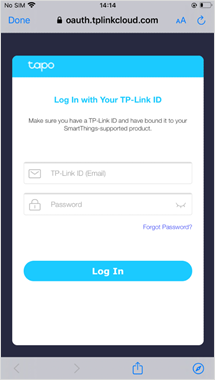
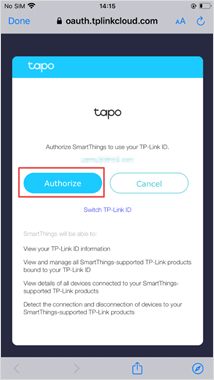
Step 5. ご利用のTP-Link IDとそのパスワードを入力し、“Authorize”をタップします。
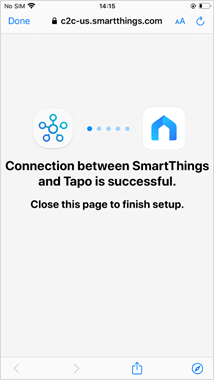
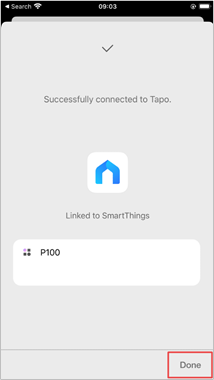
Step 6. 紐付けが完了したらページを閉じ、“Done” をタップしたら完了です。
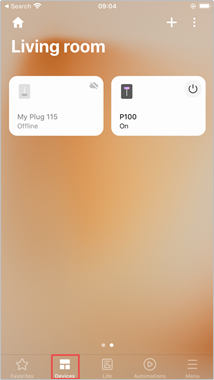
Step 7. “Devices”ページからTapoを操作可能です。
注: 紐付けを解除する場合は“Menu > Settings > Linked services”からせて位を行ってください。