How to install Tapo 1 Gang 1 Way Smart Light Switch
Recent updates may have expanded access to feature(s) discussed in this FAQ. Visit your product's support page, select the correct hardware version for your device, and check either the Datasheet or the firmware section for the latest improvements added to your product. Please note that product availability varies by region, and certain models may not be available in your region.
Follow instructions below to install your Tapo 1 Gang 1 Way Smart Light Switch, and check some using tips.
Install
1. Power Up Your Switch
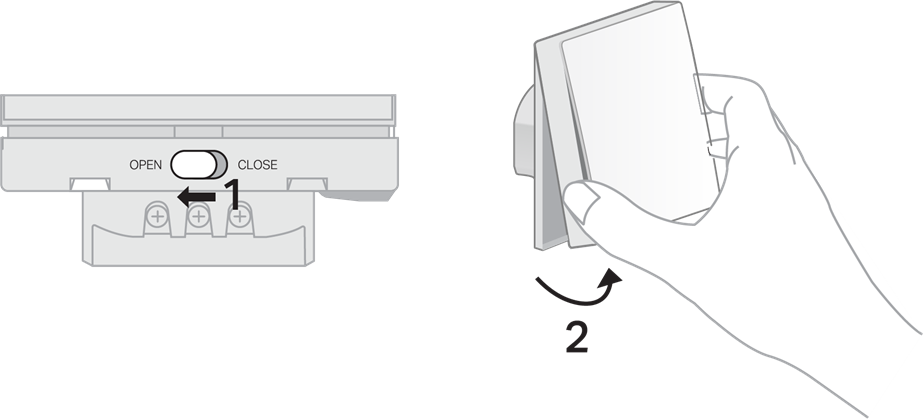
1) Slide the lock to the OPEN position. Then hold both sides of the faceplate and pull it away from the back.

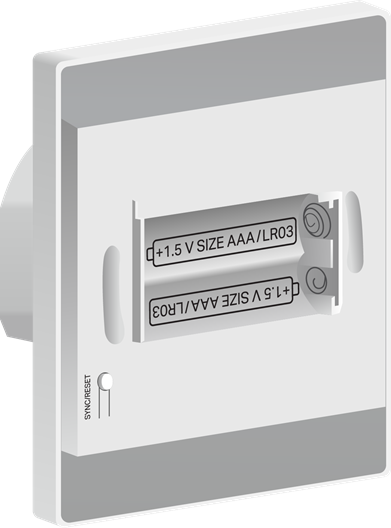
2) Insert two 1.5 V AAA/LR03 batteries. Make sure the positive and negative terminals of the batteries face the correct direction.
Rated Voltage of the Switch: DC 2.4 V ~ 3.3 V

2. Set Up Your Switch
1) Get the Tapo app from the App Store or Google Play.

2) Tap the + button in the app and select your model. Follow the instructions in the app to complete setup.
3. Wire Your Switch
1) Turn off the circuit breaker.

2) Find the hot / line wire connected to "C" or "L" of your old switch. Take a picture of the wires in case you want to go back to the old switch.
3) Disconnect the wires from the old switch.
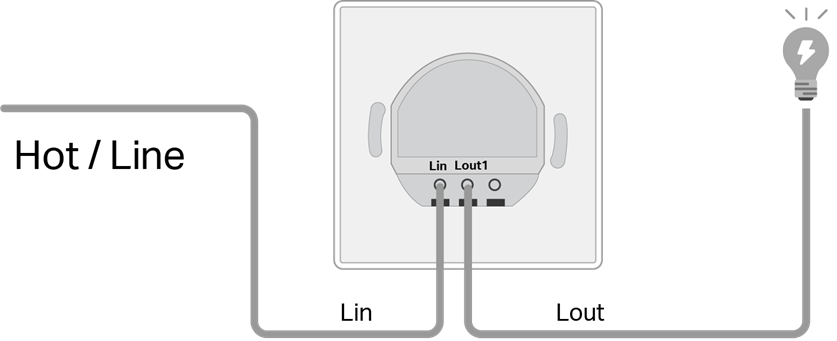
4) Install your switch following the wiring diagram below. Make sure you turn off the circuit breaker first. The switch also works if you do not distinguish between Lin and Lout wires.

Note: If the old switch is connected with a Neutral wire, cover it with the provided wire nut.

Use Instructions
- This switch can only be used with light fixtures and fans.
- Connected fans should be below 50 W.
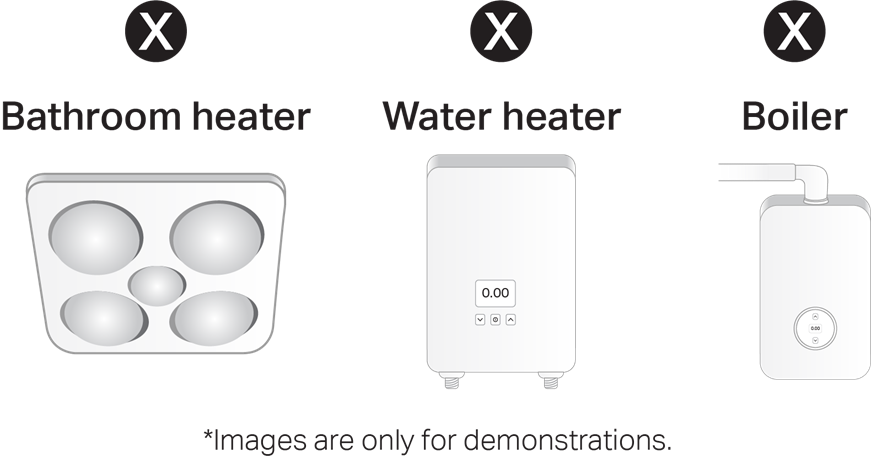
- Do NOT connect the switch to heating devices such as bathroom heaters, water heaters, and boilers.

FAQs on Batteries
Q1: Do I need to cut off power when replacing batteries after installation?
A1: No need to cut off power. The switch has current protection. Your safety is secured.
Q2: When do I need to replace batteries?
A2: If the LED blinks 3 times when you press the switch, the batteries need replacing.
Q3: What types of batteries can I use?
A3: 1.5 V AAA/LR03 alkaline batteries are recommended.
Note: Too high voltage might damage the switch. Check the max output voltage with the manufacturers if you use other types of batteries.